Azure Information Protection – How to implement AIP, (#2/3)
Although AIP is very useful, easy to use, and practical security solution, its implementation is far from simple. You may not be able to find a ‘how to install’ guide which covers from the beginning to the end.
Most of articles show you many useful links, but they covers partial information of introductions and requirements. When I started to install AIP, I found its requirements, and after clicking requirements and then found their requirements again. It was hard to escape the loop of individual useful links. ![]()
I also understand that it’s difficult to keep updated. AIP services have been changed (name of components, UI at web pages, admin dashboard) frequently just like many other Azure related services. So I think this article is just valid for a while, not for a long time.
1. Objectives of AIP Installation
After completing of all required steps, I’d like to have the followings,
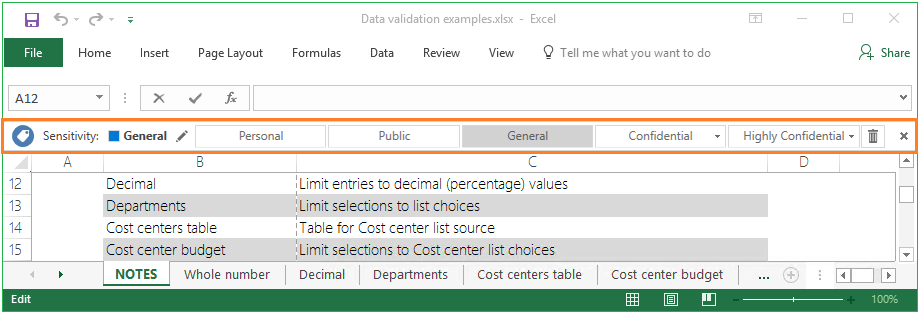
A label to set sensitivity in Microsoft Office
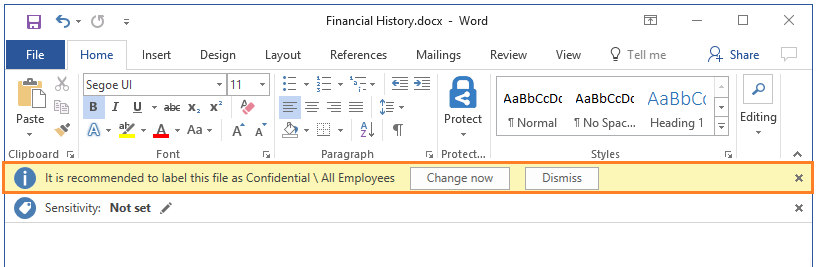
A button to protect document in the Ribbon as below.
[Classify and protect] menu to configure permissions in the Windows Explorer

If all the above can be displayed, and works fine, I think AIP installation has been completed successfully.
2. Starting a long journey to install AIP
I’m going to explain all the steps, and please let me skip why we need this. Just one good is that AIP works well in my laptop which means I could find one successful way to install AIP.
(1) Create a Microsoft Account
Create a MS account unless you have, if you have one, you’d better to make another for a testing purpose. This account will be used to subscribe Office 365 account.
(2) Subscribe Office 365
Yes, I’m explaining how to install AIP.
https://products.office.com/en-ca/compare-all-microsoft-office-products?tab=2

Don’t select any of ‘For home’,

The package name of my Office 365 subscription is ‘Office 365 Business Premium’ trial.
Note that you can select trial (Office 365, AIP) plan for all the required services.
Now, create a O365 ID,

Make sure your O365 subscription works, by logging in https://portal.office.com
3. Configure Office 365 account & subscription
Once you login O365 after subscription, there are notifications to complete your settings. Complete profile settings and any ‘action required’ from notification messages.


Go to O365 admin center


Click ‘+Add subscriptions’


Make sure that you have the ACTIVE AIP plan.

Assign users for AIP that you just subscribed. (Home > Active users)

4. Configure Azure AIP at Azure Portal
Yes, I said it’s a long journey.
Login to Azure Portal (https://portal.azure.com )

Click ‘More services>’, and type Azure Info in a search box, then it shows you AIP service as above.

Click ‘Activate’ if its status is not active. (not active by default)


I need custom permissions, so click ‘ON’, save, and publish.
5. Configuring a client (desktop)
Let me assume that the client is on Windows 10.
Click [Start] – [Settings]

Click [Accounts], and [Access work or school] to configure your Azure (O365) account. Enter your O365 email, and password to save your credential & reuse locally.
Download and install AIP client
https://www.microsoft.com/en-us/download/details.aspx?id=53018

In Summary
. You need a MS account to subscribe O365, and Azure AD account is created together.
. All the above requirements, subscriptions provide free trial plan.
. Review the objectives of this article to check if the installation is completed successfully.
. Note that once you configure a country (specially for payment), your payment option will be limited. This can cause an issue when you subscribe O365 instead of your customer.
